
When my girls asked what I wanted for my birthday back in October, I considered the Instant Pot. I wasn't sure if I really needed it since I already had a crock pot, pressure cooker canner, stove, oven, toaster, waffle iron, sandwich press, dehydrator, you name it, but then I saw the little yogurt button.
I had never made yogurt before! I love making foods from scratch. Not only can you remove all the preservatives and mystery ingredients companies add to their products, but you can limit the sugar. Want blueberry yogurt? No problem. Plain? Great! I know you can purchase yogurt makers, but I wanted an all-in-one pot that could do multiple things and become my new favorite appliance.
I told my daughters and before I knew it, I had a brand new Instant Pot on my counter. I am spoiled that way. I tried a few entrees, mostly stew or soup type meals and wasn't majorly impressed, but not disappointed either. Finally, I bit the bullet and looked up what I would have to do to make some yogurt in this bad boy. Barely anything!
I needed 2 ingredients: 2 qts. organic whole milk and 2 TBSP of yogurt with live cultures. I found Activia yogurt at our local grocery store with the probiotic culture Bifidobacterium animalis lactis. (I felt very smart there for a second.)

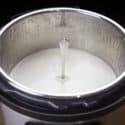
I poured the milk into my sterilized instant pot, then you heat it, cool it, add the yogurt starter and then wait about 8 hours depending how tangy you want it. This is the recipe I followed: https://www.pressurecookrecipes.com/instant-pot-yogurt/
Instant Pot Yogurt #12
Prep
Cook
Total
Foolproof Instant Pot Yogurt Recipe #12 (Pressure Cooker Yogurt): Step-by-Step Guide on how to make smooth, thick & creamy homemade yogurt based on 12 experiments.
Author: Amy + Jacky | Pressure Cook Recipes
Cuisine: World
Serving: 2 L
Ingredients
- 2 litres (1/2 gallon) Whole Foods 365 Organic 3.8% Whole Milk
- 32 grams (a little more than 2 tbsp) Dannon/Danone 4% Plain Greek Yogurt with Active Bacterial Cultures
Instructions
- Optional Equipment Sterilization: Place 2 cups of cold water and a trivet in the Instant Pot. Place silicone spatula, Pyrex glass measuring cup, and tablespoon measuring spoon in the Instant Pot. Close the lid and move the Venting Knob to Sealing Position. Sterilize everything at High Pressure (Use the manual/pressure cook button) for 3 minutes + natural release. Or Sterilize on Stovetop: sterilize the equipment (including meat thermometer) on stovetop by boiling them for 10 minutes. After sterilization, air dry the equipment on a clean rack.
- Heat Milk to 180°F - 200°F to Denature the Protein: Pour 2L (1/2 gallon) of Organic 3.8% whole milk in the inner pot. Close lid (venting knob position doesn’t matter). Use the Yogurt More function to boil the milk to at least 180°F. It will say “boil” on the screen. It will take roughly 35 – 40 minutes. The Instant Pot screen will change to “yogt” when the boiling is done.
- Check Milk Temperature: Open the lid. Check the milk temperature immediately in a few spots and make sure the milk is over 180°F. Stir with a silicone spatula and check the temperature again to make sure the milk is over 180°F. *Pro Tip: If the milk is not over 180°F, close the lid and heat the milk with the Slow Cook Less function for another 15 minutes.
- Prepare Yogurt Starter: After the milk is heated over 180°F, place 32g (a little more than 2 tbsp) Dannon/Danone 4% Plain Greek Yogurt with Active Bacterial Cultures into the Pyrex glass measuring cup. Do not add the yogurt starter to the hot milk, as it will kill the bacterial cultures. (If you sterilized the measuring cup, make sure it has cooled to the touch).
- Cool Milk to 111°F: You can leave the pot on counter-top and wait until the milk cool to 111°F. Or alternative method to quickly cool down the milk temperature: Fill a larger pot or kitchen sink with cold tap water. Partially submerge the inner pot with heated milk into the cold tap water. Stir the milk in a circular motion with a silicone spatula and frequently measure the temperature. It will take 2 – 4 minutes to cool the milk to 111°F. Remove the pot from cold water immediately. *Pro Tip: Try not to touch the bottom of the pot with the spatula as it may have some milk solid stuck to the bottom of the pot.
- Add Yogurt Starter: Add ½ cup of 111°F milk to the Pyrex glass filled with yogurt starter. Gently mix it with the tablespoon measuring spoon. Pour the yogurt milk mixture in the inner pot and give it a few gentle stirs with silicone spatula.
- Yogurt Incubation: Place inner pot back in the Instant Pot. Close lid (Venting Knob position doesn’t matter) and use the Yogurt Normal Function to incubate the yogurt. Adjust the time to 8:00 – 12:00 depending on how tangy you like your yogurt (longer time = more tangy). You can open the lid for a taste test once the yogurt is set. Roughly 6 hours. *Pro Tip: Don’t disrupt the fermentation process by moving the Instant Pot or opening the lid. Wait until it is set (roughly 6 hours) before opening the lid.
- Stop the Incubating Process: Once the yogurt has reached the desired tangy level, remove the inner pot of yogurt and place it in the fridge for a few hours to stop the incubating process. The yogurt will also thicken a little.
- Serve: Plain yogurt is done. Serve by adding sweeteners such as honey or maple syrup. Add fruits, granola or your favorite toppings. The sky is limit! ? *Pro Tip: If the yogurt is too runny, you can strain the yogurt with a yogurt strainer.
Nutrition Information
Serving size: 10 Calories: 145 Fat: 8.5g Saturated fat: 5.1g Carbohydrates: 11.1g Sugar: 10.3g Sodium: 86mgFiber: 0g Protein: 7.9g Cholesterol: 26mg
It was so easy and absolutely DELICIOUS!!! I was totally blown away. The texture was creamy and smooth, I loved it, we all did. I made a strawberry and blueberry fruit compote for the bottom of the container using honey, but think in the future I will make it, but leave it in a separate container to stir in right before. This way we aren't stuck with what I have put in there and can choose the flavors we want.
For the compote, I basically put about 2 cups fruit in a saucepan with a pinch of salt and 2 TBSP honey and simmered it until it thickened up. After it cooled, I put about 1/4 Cup compote on the bottom of the container, then topped it with the yogurt, I put lids on the jars then put them in the refrigerator.

No comments:
Post a Comment